In Cell ELISA
实验概要
This protocol is a general protocol for ICE analysis and can be used with any of Abcam's ICE-validated antibodies. Antibodies are available in single quantities or are available in smaller amounts as part of a sample ICE pack. Specific scientific information, background and working concentration for each antibody are detailed in each antibody’s corresponding Data Sheet.
实验原理
In-Cell ELISA is a quantitative immunocytochemistry method to measure protein levels or post-translational modifications of cultured adherent cells. The cells are grown in and fixed to the bottom of a coated 96-well plate. Targets of interest are detected by primary antibodies, which are in turn are quantified with labeled secondary antibody(ies). MitoSciences offers highly-specific, well-characterized primary antibodies generated from mouse or rabbit host species. Available secondary antibodies include IRDye®- or HRP-labeled anti-mouse and anti-rabbit antibodies, as well as IRDye®-labeled isotype specific anti-mouse antibodies. By combining primary antibodies of different species or isotype and appropriate IR-labeled secondary antibodies, two color multiplexing can be achieved in the 800/700 channels using a LI-COR® Odyssey® or Aerius® system. While assays using HRP labeled secondary antibodies are quantified using a standard spectrophotometer but cannot be multiplexed.
主要试剂
1. ICE-validated primary antibody(ies)
2. Appropriate 2500X IRDye®- or HRP- labelled secondary antibody(ies)
3. For HRP detection, HRP solution substrate is necessary such as KPL Sureblue TMB solution
4. Adequate instrumentation. For IRDye® use a LI-COR® Odyssey® or Aerius® near-infrared imaging system. For HRP detection use a spectrophotometer plate reader (Molecular Dynamics SpectraMax recommended) capable of measuring absorbance at 650 (preferably in a kinetic mode) or 450 nm
5. 20% paraformaldehyde
6. Deionized water
7. Multichannel pipette (recommended)
8. 10X Phosphate Buffered Saline (PBS) (80 mM Na2HPO4, 14 mM KH2PO4, 1.4 M NaCl, 27 mM KCl, adjust pH to 7.4 with NaOH)
9. 100X Triton X-100 (10% solution in H2O)
10. 400X Tween-20 (20% solution in H2O)
11. 10X blocking buffer
12. 0.3% solution Janus Green Stain (in H2O)
13. Clear bottom, (black wall necessary for IRDye only), 96-Well Assay Microplate, preferably coated (amine/collagen) for optimal cell culture
14. 0.5 M HCl
实验步骤
1. Preparation of sufficient buffers and working solutions to analyze a single microplate
1) Prepare 1X PBS by diluting 45 ml of 10X PBS in 405 ml Nanopure water or equivalent. Mix well. Store at room temperature
2) Prepare 1X Wash Buffer by diluting 0.625 ml of 400X Tween-20 in 250 ml of 1X PBS. Mix well. Store at room temperature
3) Immediately prior to use prepare 8% Paraformaldehyde Solution by mixing 6.25 ml Nanopure water, 1.25 ml 10X PBS and 5.0 ml 20% paraformaldehyde
4) Paraformaldehyde is toxic and should be prepared and used in a fume hood. Dispose of paraformaldehyde according to local regulations
5) Immediately prior to use prepare 1X Permeabilization Buffer by diluting 0.25 ml 100X Triton X-100 in 24.75 ml 1X PBS. Mix well
6) Immediately prior to use prepare 2X Blocking Solution by diluting 5 ml 10X Blocking Solution in 20 ml 1X PBS
7) Immediately prior to use prepare 1X Incubation Buffer by diluting 2.5 ml 10X Blocking Solution in 22.5 ml 1X PBS
2. Cell Seeding
1) Adherent cells can be grown in the recommended assay plates or seeded directly into the assay plate and allowed to attach for several hours to overnight. The optimal cell seeding density is cell type dependent. For suggestions regarding the cell seeding see Appendix. As an example, HeLa cells should be seeded between 25,000 and 50,000 cells per well.
2) The attached cells can be treated as desired in 100 ?l media. For suggestions regarding the treatment to induce apoptosis, positive and negative controls see Appendix.
*Note – When treatment with drug of interest is performed, it is recommended to include wells with untreated cells and cells treated with the vehicle only.
3) After treatment proceed to Step C1.
3. Cell Fixation
1) Immediately add an equal volume (100 µl) of 8 % Paraformaldehyde Solution to the wells of the plate containing culture media.
2) Incubate for additional 15 minutes.
3) Gently aspirate the Paraformaldehyde Solution from the plate and wash the plate 3 times briefly with 1X PBS. For each wash, rinse each well of the plate with 300 µl of 1X PBS. Finally, add 100 µl of 1X PBS to the wells of the plate. The plate can now be stored at 4°C for several days. Cover the plate with provided seal. For prolonged storage supplement PBS with 0.02% sodium azide
*Note – The plate should not be allowed to dry at any point during or before the assay. Both paraformaldehyde and sodium azide are toxic, handle with care and dispose of according to local regulations.
4. Assay Procedure
*Note – It is recommended to use a plate shaker (~300 rpm) during incubation steps. Any step involving removal of buffer or solution should be followed by blotting the plate gently upside down on a paper towel.
1) Remove PBS and add 200 µl of freshly prepared 1X Permeabilization Buffer to each well of the plate. Incubate 30 minutes
2) Remove 1X Permeabilization Buffer and add 200 µl of 2X Blocking Solution to each well of the plate. Incubate 2 hours
3) Prepare 1X Primary Antibody Solution by diluting MitoSciences stock antibody(ies) into 1X Incubation Buffer. See Appendix for more information
4) Remove 2X Blocking Solution and add 100 µl diluted Primary Antibody Solution to each well of the plate. Incubate overnight at 4°C
*Note – To determine the background signal it is essential to omit primary antibody from at least one well containing cells for each experimental condition and detector antibody used.
5) Remove Primary Antibody Solution and wash the plate 3 times briefly with 1X Wash Buffer. For each wash, rinse each well of the plate with 250 µl of 1X Wash Buffer. Do not remove the last wash until step 8.
6) Prepare 1X Secondary Antibody Solution by diluting 4.8 µl of 2500X labeled-secondary antibody(ies) into 12 ml 1X Incubation Buffer. Note – Protect fluorescently labeled antibodies from light.
7) Remove the 1X Wash Buffer and add 100 µl 1X Secondary Antibody Solution to each well of the plate. Incubate 2 hours
8) Remove Secondary Antibody Solution and wash 4 times briefly with 1X Wash Buffer. For each wash, rinse each well of the plate with 250 µl of 1X Wash Buffer. Do not remove the last wash.
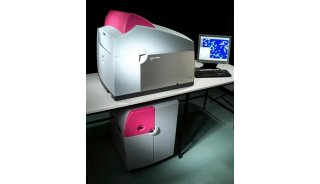
9) For IRDye conjugated secondary antibodies, wipe the bottom of the plate and the scanner surface with 70% ethanol and scan the plate on the LI-COR® Odyssey® system using both 700 and 800 channels according to manufacturer’s instructions (Suggested intensity range 5-7).
For HRP conjugated secondary antibodies, remove the last wash and blot the plate face down to remove excess liquid. Add 100 µl HRP Development Solution. Pop any bubbles and immediately record the blue color development in the microplate reader prepared as follows:
5. Whole Cell Staining with Janus Green (Optional)
*Note – The (IR or HRP) signal of antibody-specific complexes can be normalized to the Janus Green staining intensity to account for differences in cell seeding density. It is recommended to use a plate shaker (~300 rpm) during incubation steps.
1) Empty microplate wells and add 50 µl of 1X Janus Green Stain per well. Incubate plate for 5 minutes at room temperature.
2) Remove dye, wash plate 5 times in deionized water or until excess dye is removed.
3) Remove last water wash, blot to dry, add 200 µl of 0.5 M HCl and incubate for 10 minutes.
4) Measure using a LI-COR® Odyssey® scanner in the 700 nm channel or measure OD at 595 nm in a standard microplate spectrophotometer.
6. Data Analysis
*Note – Analyze data using LI-COR® ICW software, or other suitable data analysis software, such as Microsoft Excel or GraphPad Prism.
1) Correct the raw ICE signal for the background signal by subtracting the mean signal of well(s) incubated in the absence of the Primary Antibody from all other readings.
2) This step is optional. Correct the Janus Green for the background signal by subtracting the mean Janus Green signal of well that do not contain cells from all other Janus Green readings.
3) Normalize the ICE signal. Divide the background-corrected ICE signal by the (background-corrected) Janus Green signal.


